Hanami dress

Hanami dress by Straightgrain Patterns

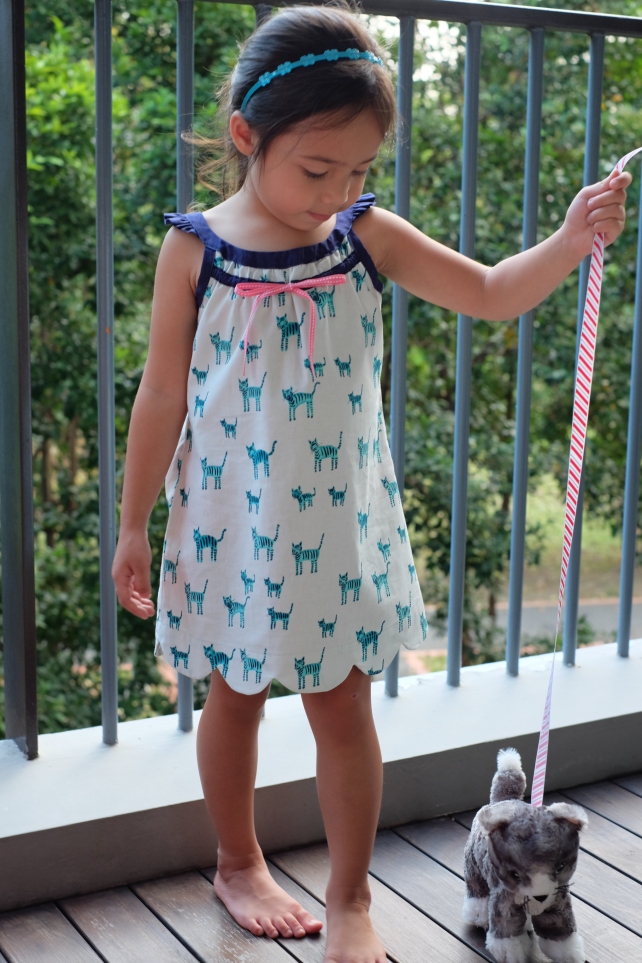
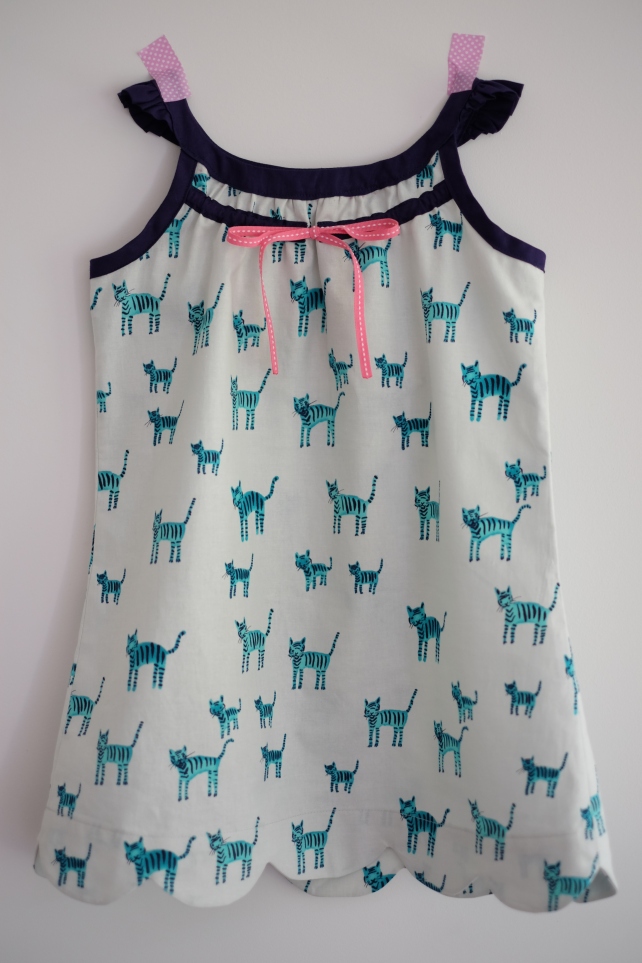
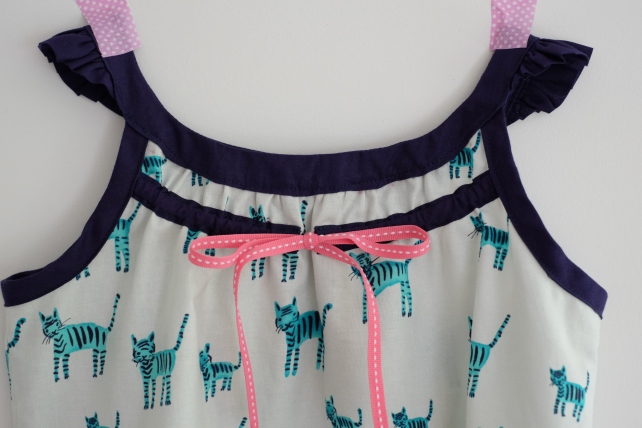
I’ve decided I should try to challenge myself a little bit and learn new techniques so this dress involves a peter pan collar, invisible zipper, bodice lining, and a blind hem.  I seem to be braver when I make stuff for her anyway, I always avoid all of these things when I make my own clothes. The pattern is the Hanami dress by Straightgrain Patterns and the instructions are clear and easy enough to follow. I’ve seen a lot of cute versions but my favourite is Carolyn’s cat Hanami dress. She removed 3/4 inch off from the length of the bodice and added width to the skirt and I think I’ll try her changes for my next one.

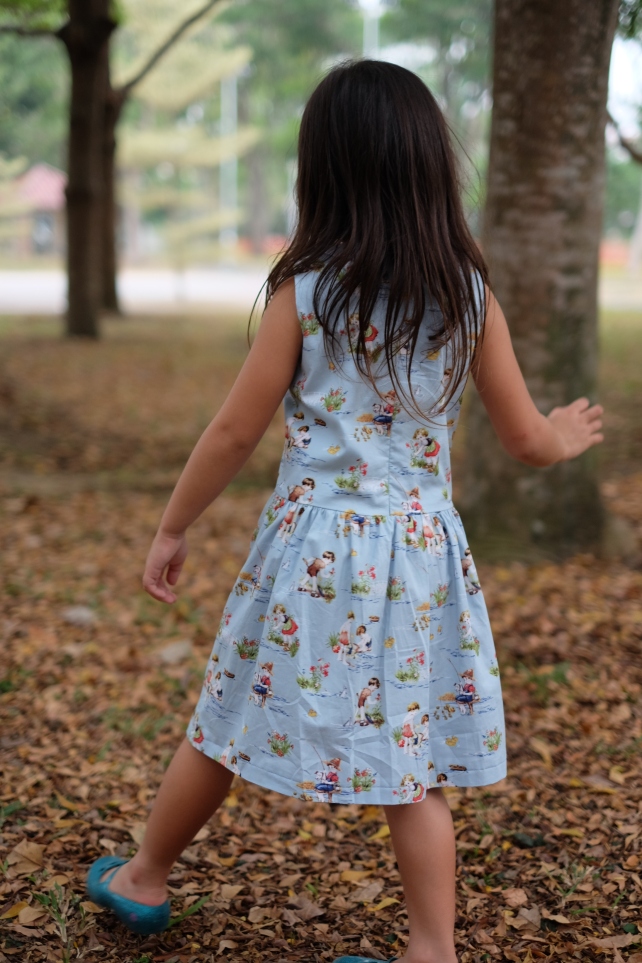
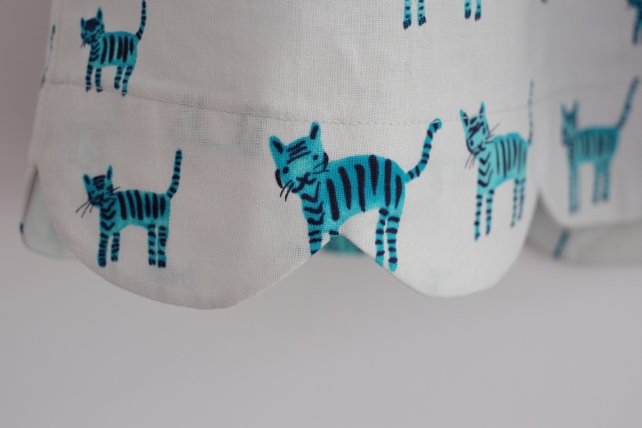
I also hand-basted the invisible zipper to make sure it won’t move while sewing it to the bodice. I think it’s worth the extra effort. The blind hem was just an afterthought since I’ve never used my blind hem footer ever. I figured it’s a good time to give it a try and I like how it looks. My only regret is not matching the back seam print.


Hanami dress by Straightgrain Patterns

Hanami dress by Straightgrain Patterns

Hanami dress by Straightgrain PatternsHanami dress by Straightgrain PatternsHanami dress by Straightgrain PatternsHanami dress by Straightgrain Patterns

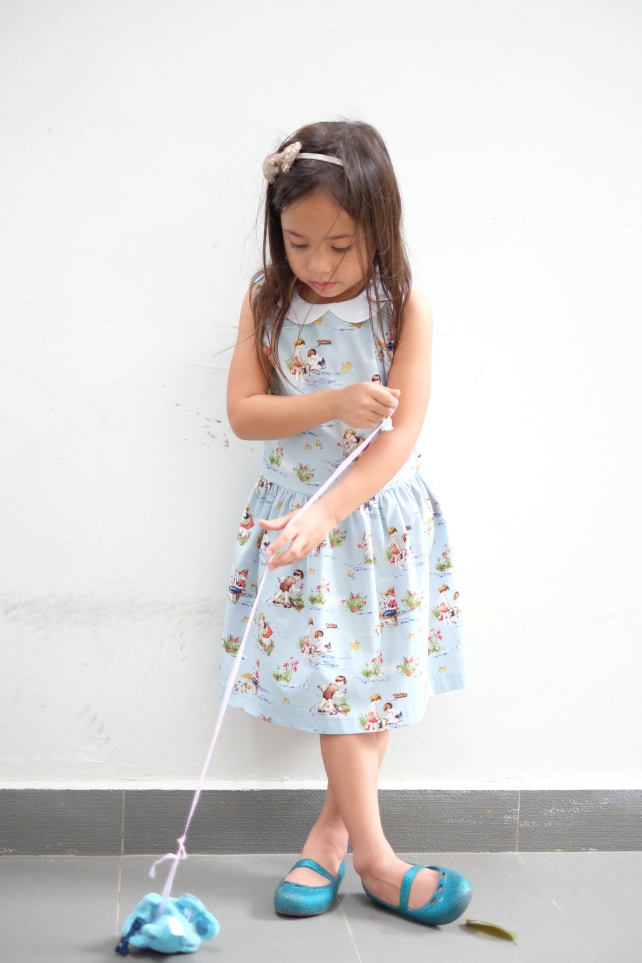
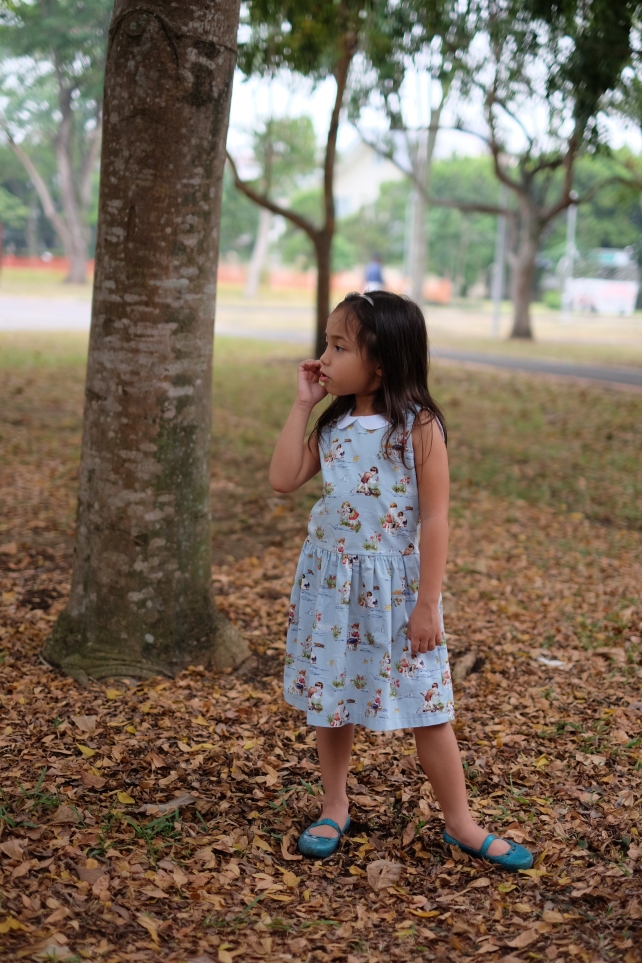
Pattern: Hanami dress by Straightgrain Patterns

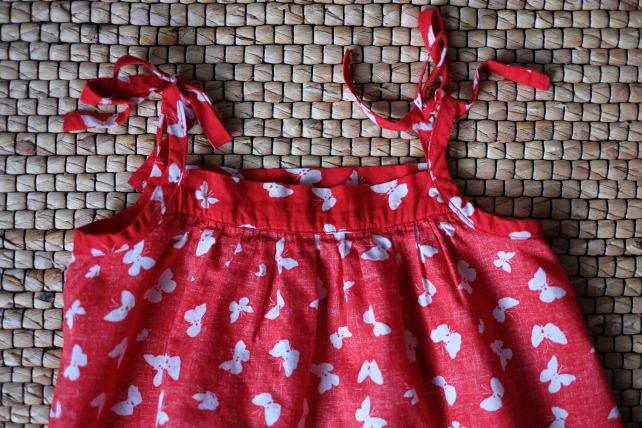
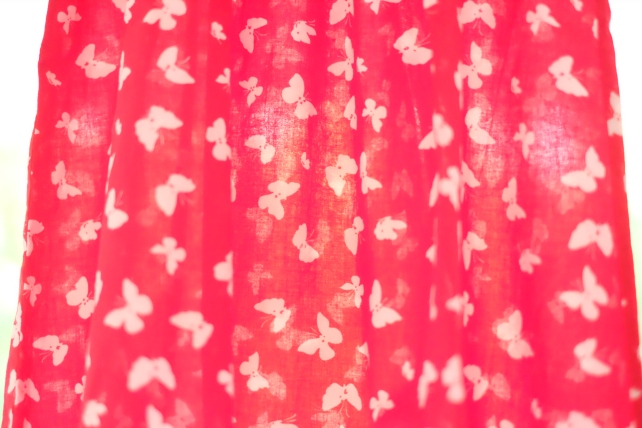
Fabric: Vintage kids Cotton poplin from Spotlight for 10sgd per meter (I think I got it on sale).  I bought 1.5 meters and I think I still have a bit of fabric left. The bodice lining is white voile from Spotlight too.

Sizing: 5Y

Design Changes: Used blind hem

The Verdict: I love that I learned how to make a peter pan collar – it’s far from perfect but I’m happy I finally tried it. It’s a cute fit on muppet too. I’m going to try the flutter sleeves next.

Oliver + S Popover Sundress

I’m so behind blogging my finished makes. I think I made this dress last December and took photos last June (while on holiday so the dress needs a bit of ironing), finally blogging about it now in September. I used the free pattern Popover Sundress from Oliver + S, it’s a really easy one to make and again with Oliver + S, I enjoyed making it. The fabric is a pretty cotton voile from Spotlight I bought when I was just starting to sew. I added a white crochet ribbon underneath the yoke edge and added 6 inches to the front and back’s width to make the dress fuller.

Pattern: Oliver + S Popover Sundress

Fabric: less than 1 meter of cotton voile from Spotlight  / Ribbon: white crochet ribbon from Daiso

Sizing: 4, the yoke is a little too wide. It only fits her nicely now that she’s almost 5 years old

Construction Notes:

– Used french seams
– Added white lace underneath yoke
– Added 6 inches to the front and back’s width to make it fuller (the gathered dress was inspired by Carolyn and Katie‘s versions.)
– I think I added length as well but I can’t remember how much now since I made a long time ago (!)

The Verdict: It’s a pretty summer dress make, I have yet to make it using a quilting cotton but it’s perfect in voile.

Oliver + S Popover Sundress  Oliver + S Popover Sundress    Oliver + S Popover Sundress    Oliver + S Popover Sundress  Oliver + S Popover Sundress  Oliver + S Popover Sundress  Oliver + S Popover Sundress


Oliver + S Popover Sundress

Oliver + S Popover Sundress

Oliver + S Popover Sundress

Oliver + S Popover Sundress

Polka dot Southport dress

I loved my first Southport dress so much that of course I had to make another one. This time, I used View A and got rid of the bodice’s button placket. I got the fabric from Miss Matatabi’s clearance sale, it’s a buttery soft cotton rayon and I enjoyed sewing it – it was drapey but not slippery. I’ve already sewn the darts when I realized I forgot to staystitch the neckline and armholes, oops. So yes, sadly, one side of the neckline has been stretched a bit. I hoped ironing it with lots of steam would fix it but I can still see a little bit of the neckline is sticking outwards.

PatternSouthport dress by True Biasmade it once here

Fabric: Super soft and perfect for summer Cotton Rayon polka dot fabric from Miss Matatabi, it’s 52% cotton, 48% rayon lawn. I bought 2 meters for only 20sgd and I almost used it all.

Sizing: 8 which is a 36 bust – 30 waist – 38 hips (I measure 36-30-36)

Construction Notes: Used french seams, removed the button placket. Again, I followed the sew-along, and the instructions were very clear and easy to follow.

The Verdict: It’s a little big I think, most likely because the fabric is very drapey. If I ever make it again in a drapey fabric, I think I’ll size down and use size 6. I still love it and it is quite versatile – worn it once for dinner and as a coverup at the beach during our last holiday in Hua Hin, Thailand.

True Bias Southport dress

store_sizing_southportTrue Bias Southport dress

True Bias Southport dress True Bias Southport dress

True Bias Southport dress

True Bias Southport dress

Southport dress

PatternSouthport dress by True Bias, i got it when it was on sale for 25% off

Fabric: Cotton Rayon rope print fabric I bought a year ago from an online fabric shop Indian Beautiful Art for around 24 dollars for 3 yards. I think I almost used the entire 3 yards because this fabric is quite narrow at 41″.

Sizing: 8 which is a 36 bust – 30 waist – 38 hips (I measure 36-30-36)

Construction Notes: Used french seams on the shoulder and side seams, chopped off 4 inches from the skirt’s length (I’m 5’3″), skipped the interfacing and sewed the buttons through both layers for a faux button opening because I was lazy. I followed the sew-along, and the instructions were very clear and easy to follow.

The Verdict: I love this dress! I’ve worn it once for dinner with friends and it was comfy and still quite cool for the Singapore weather. I can also eat a lot and just adjust the drawstring haha. I love the slit which lets me move easily but doesn’t expose a lot of skin. I’m making a knee length version of the Southport dress and I hope I will love it as much as this one. Oh and I’m thinking of making a navy rayon challis maxi like Teresa’s because it’s my favourite Southport so far.

True Bias Southport dress True Bias Southport dress True Bias Southport dress True Bias Southport dress True Bias Southport dress True Bias Southport dress True Bias Southport dress True Bias Southport dress

Oliver + S Onstage Tutu Skirt

Another free pattern! It’s the Onstage Tutu Skirt pattern from Oliver + S and I made it especially for the Swan Lake ballet we watched last weekend.  The skirt was really easy to make –  and I used the embroidered cotton’s pretty selvedge edge as hem so no hemming was done at all. It was my first time to use a tulle and I was surprised that it was quite easy to work with. This skirt was inspired by a pretty skirt I saw on Pinterest and so one afternoon I went to Chinatown and Spotlight to get the fabrics. 5 months later, I made the skirt :).

I followed the Onstage Tutu Skirt tutorial which was really good as usual. I used the entire 1 meter of the fabric as the width of the front skirt, and 1 meter for the back skirt to make it really twirly. I didn’t expect that she would love it because it wasn’t pink but she does. She’s already worn it twice and I only made it 5 days ago.

Pattern: Oliver + S Onstage Tutu Skirt

Fabric: 1 meter of light grey embroidered cotton from Chinatown, 8 dollars per meter / Tulle: 1/2 meter of black tulle from Spotlight, around 5 dollars

Sizing: Used an existing skirt to get this skirt’s length

Construction Notes:

– Used french seams although the seams got a bit thick because of the embroidered edge of the fabric
– Used the embroidered fabric’s selvedge edge as hem

The Verdict: We love it! The waistband which encloses the tulle so it won’t be itchy at the waist is very clever. And of course, she made me promise that her next tutu will be in pink!

Oliver + S Onstage Tutu Skirt

Oliver + S Onstage Tutu Skirt

Oliver + S Onstage Tutu Skirt

Oliver + S Onstage Tutu Skirt

Oliver + S Onstage Tutu Skirt

Oliver + S Onstage Tutu Skirt

Oliver + S Onstage Tutu Skirt

Oliver + S Onstage Tutu Skirt

Oliver + S Onstage Tutu Skirt

Oliver + S Onstage Tutu Skirt

Oliver + S Onstage Tutu Skirt

Charlie dress

I’ve been eyeing this pattern for a while now, and finally I bought it during a 50% off sale. The description of the dress says “Charlie was inspired by the adorable waist dresses Lucy and Sally wore in the Charlie Brown comic books. Charlie’s swingy silhoutte and oh-so-cute flounce skirt is said to cause spontaneous twirling“. I definitely agree! I’ve seen a lot of cute Charlie dresses like this purple beauty, this pretty floral one, and this Nani Iro dress that makes me want to sew one in my size.

The dress was quite easy to construct, attaching the bias facings for the neck and armholes took the longest time for me. And choosing the back button haha. This was the first time I made a button loop and it was nice to try something new that is not too intimidating. I only wished I’ve made an effort to pattern match the back seams but all in all I’m very happy with this dress.

Pattern: Charlie dress PDF pattern by Mingo and Grace (I bought during a flash sale 50% off so I got this pattern for 5 usd)

Fabric: Gigi in Marseille – Swirly Girl Design – Michael Miller Fabric quilting cotton fabric bought at my local online fabric shop The Laughing House at around  14 sgd per yard. I bought 1.5 meters but I think I only used a yard so I can still make another top or skirt out of it 🙂 / Store bought yellow bias tape

Sizing: 4

Design Changes: Used bias tape for the hem’s dress. I didn’t follow the instructions in attaching the bias tape on flat for the armholes. Instead, I sewed the side seams first and suffered a lot trying to attach the bias tape with the the tiny, tiny armholes. Argh. Next time, I promise to follow instructions.

The Verdict: I love it and she loves it! I want to make a few more. I think it’s the ideal pattern to make dresses as gifts for my niece and friends’ kids.

Charlie dress pattern by Mingo and Grace

Charlie dress pattern by Mingo and Grace

Charlie dress pattern by Mingo and Grace

Charlie dress pattern by Mingo and Grace

Charlie dress pattern by Mingo and Grace

Charlie dress pattern by Mingo and Grace

Charlie dress pattern by Mingo and Grace

Charlie dress pattern by Mingo and Grace

Charlie dress pattern by Mingo and Grace

Simple Sleeveless Top and Everyday Skirt

I love sleeveless tops. That’s all I ever wear in always sunny Singapore and so most of the time that’s what I sew for myself. This sleeveless top here is extra special because it’s a little bit fitted (on waist and hips) than most of my tank top patterns so I can tuck it in. I like that! It’s the Simple Sleeveless top pattern from the Learn to Sew with Lauren book that I got from my England trip last September.  I chose my size based on my measurements which is a 12 and it fits me just nice.

Top PatternSimple Sleeveless top pattern from the Learn to Sew with Lauren book

Fabric: A floral lawn fabric I bought in the Philippines 2 years ago.

Sizing: 12 – bust 36, waist 30, hips 40 (my hips measure 36 but I just used size 12 all the way)

Design Changes: Used french seams, made my own bias tape, used a smaller hem because I prefer a slighly longer top.

The Verdict: I love it. I can wear it with skirts and shorts so I’m happy. I’m currently cutting 2 more tops, one in dotted swiss and one in rayon challis.

Simple Sleeveless top and Everyday skirt

DSCF7014

DSCF7080


DSCF6999DSCF7031 DSCF7035

DSCF7095DSCF7097

Simple Sleeveless top and Everyday skirtDSCF6974

I’ve made the Liesl + Co’s Everyday skirt before so this was an easy make. I used XS size this time but I think I like the size S’s fit better on me. Most of my tops have patterns so I made this in a plain fabric, a little boring but at least I can pair it with a lot of my tops.

Skirt Pattern: Liesl + Co’s Everyday skirt (made it before, here)

Fabric: Robert Kaufmann’s Brussels Washer in denim

Sizing: XS

Design Changes: Made a bigger hem because it was a bit too long.

The Verdict: I like that I can pair it with a lot of my tops. I’m planning to make a at least 2 more Everyday skirt. I’ll use a size S next time.

DSCF6975 DSCF6976

Oliver + S Badminton dress

I’ve made the skort and top before, so making this dress was a bit faster (thankfully!). I trimmed my seam allowances at the yoke/facing too much though so I struggled edge stitching the yoke. Other than that, I still enjoyed making it. The muppet is into all things that are cats these days, thus the chosen fabric and so I can definitely say that she is in love with this dress. I asked her to try it on so I can snap some photos and she didn’t want to take it off anymore. I let her choose the ribbon as well, and of course she chose pink. Now that I look at it, I think the pink does add a nice pop of colour to the dress.

Pattern: Oliver + S Badminton skort, top + dress (made the skort once before, here and skort and top, here)

Fabric: Tiger Stripes in Blue – Hatbox – Alexia Abegg – Cotton + Steel quilting cotton fabric bought at my local online fabric shop The Laughing House for 16 dollars per yard / Yoke & sleeves: Solid navy blue voile bought at a fabric shop in Yangon / Ribbon: Pink with running white stitches bought in Hong Kong years ago

Sizing: 4

Design Changes: Nothing. Next time, I will add some length to the dress.

The Verdict: We love it. I’ll probably make a few more of these dresses. I think I need a break from all this sewing for muppet so next project will be for me. 🙂

Oliver + S Badminton dress

Oliver + S Badminton dress

Oliver + S Badminton dressOliver + S Badminton dress

Oliver + S Badminton dress

Oliver + S Badminton dress Oliver + S Badminton dress

Oliver + S Badminton dress

Oliver + S Badminton dressOliver + S Badminton dress

Oliver + S Badminton skort and top

Wow! That’s what I said when muppet first tried this skirt and top and on. I couldn’t believe I made something so pretty and quite complicated (for me). You see, I always stick with beginner patterns but I finally decided to try this Oliver + S Badminton skirt, top + dress (rated as 2 scissors). The top was quite fiddly especially attaching the ruffles to the yoke and it looked like a one big mess and so I avoided it for weeks and weeks. I finally decided to finish it during the long Chinese New Year holidays and I’m so glad I did. Luckily, she was wearing this outfit when we had a meal in the charming and rustic Joo Chiat so most of the photos were taken in front of the pretty (and closed due to the holidays) shophouses.

Pattern: Oliver + S Badminton skort, top + dress (made the skort once before, here)

Fabric: Navy blue with tiny white flowers 100% cotton bought at a fabric shop in Arab Street for 8 dollars per meter / Top: Solid teal voile bought at a fabric shop in Chinatown for 8 dollars per meter / Ribbon: Blue with running white stitches bought in Hong Kong years ago

Sizing: 4

Design Changes:

– Used the entire 60″ width of the fabric for the skirt to make it fuller
– Skipped the scallops for the skort
– Used french seams for the top
– Made the top’s hem smaller because originally (as in these photos), the top looked a bit short on her. Must be because of muppet’s big belly haha.

The Verdict: I love it! My paper pattern comes only until size 4 so I’m planning to make more of this. I’ll probably make the dress next. My daughter also loves it a lot, and it is not even pink!

PS This summary of Pattern/Fabric/Sizing/Design Changes/Verdict format was adapted from The Quirky Peach’s blog. I love her blog and I think this summary is much easier (and cleaner) to read.

Oliver + S Badminton skort and top


Oliver + S Badminton skort and top


Oliver + S Badminton skort and top


Oliver + S Badminton skort and top


Oliver + S Badminton skort and top

We can see her belly when she raises her arms so I made the top a bit longer later on


Oliver + S Badminton skort and top


Oliver + S Badminton skort and top


Oliver + S Badminton skort and top


Oliver + S Badminton skort and top


Oliver + S Badminton skort and top


Oliver + S Badminton skort and top

And that’s a wrap!